Tuesday, 19 February 2013
Rocker update
After turning and rough shaping the arm rests the stepped round mortises were drilled into the stiles. The arms were then further shaped and fitted.
This done, the spindles are then marked out and tapered to a 12-13mm square at their base. This square shaft is then rounded.
After rounding the spindles I then drilled the 7 spindle holes in the rear deck of the Elm seat and individually fitted each spindle to a respective hole.
Drilling the crest to accept the tops of the spindles will round out the last of the drilling for the rocker, with the exception of the small holes for pegging the rockers and crest rail. All still on track for a March 1st delivery.
Thursday, 14 February 2013
Whose feet?
Like most of us, I like to think that I have a reasonable grip on general knowledge. You know, stuff in general. I also like to think used to think that I could explain most of the trivia floating around in my head reasonably clearly and coherently. That was then... this is now.
Picture this. Travelling home from Bendigo after picking up some Claret Ash logs, my boy Tom (5) along for the ride. It was hot, we were both tired and Tom was amusing himself with my tape measure. Anyone who's met Tom, knows this is classic Tom.....
"Dad. Why are there wide numbers on the bottom and close numbers on the top?"
"The bottom is in Inches and top is in Millimetres mate." ( you can see where this is going..right? )
"Like inch worm?"
"Well sort of, inches are what Grandad used to use and we use millimetres."
"Why are they different?"
"Ahhh. Mmmm. Well inches were the smaller increment from feet."
"Whose feet?" What's a feet?"
"It's a foot mate. Not a feet."
"So there's only one of them?"
"Sorry T, a foot is an imperial measurement. Not like your foot. But.... I think it originated from the length of someones foot? Perhaps?"
"Like Star Wars. They have the Imperials."
"Ok, yes they.........No No. Nothing to do with Star Wars. Inches are imperial and Millimetres are metric."
"Is metric new?"
"Yes in a way. But not really. It's a bit confusing. There's 12 inches to a Foot, 3 Feet to a Yard, something like 20 Yards to a Chain. Then there's a Furlong and a Mile."
"I thought it was a foot not a feet. How big is a "Furwrong" ?"
"I don't know."
"Did you say Chain?
"Yes mate." ( Oh please stop... )
"Is that like a Chain?"
"Do you mean a metal chain?"
"I think so. Is that what you mean too? Like Millie's ( Our Jack Russell ) chain."
"No it's an imperial measurement."
"Why?"
"I don't know."
"Whose Yard?"
"What? What do you mean whose.... oh, yeah a yard. The best way I can explain a yard is it's very close to a metre."
Long pregnant pause with a perplexed look on Tom's face.
"Dad."
"Yes mate."
"I like the millimetres."
"Yes mate, so do I."
Tuesday, 12 February 2013
Tom's Cottage
Kyneton's strong gold rush history and architecture was certainly a drawcard to us moving to the area. I'm fascinated by old building techniques and methods. If I'm looking around historic buildings I spend as much time staring at framing techniques and joints as anything else. This last week has seen a few old gems revealed within a stones throw of our shop. So I couldn't resist taking a couple of photos for posterity.
One is the old grain store behind the bluestone flour mill. A new roof should see it last another hundred years at least.
Good friends, fellow workshop occupiers and neighbours Joe and Deb are in the process of renovating and rebuilding a very old weatherboard addition to their brick and bluestone residence.
'Tom's Cottage' got it's name from the cobbler who lived there sometime around the gold-rush period. But well over a hundred years of neglect have ensured that all of the bottom plates that used to hold up the stud walls have all but vanished into the dirt. What did remain of the walls though was a great insight on how the frames were constructed, what materials were used and just how well they were built.
Here's one of the walls which adjoins the current brick structure. The interesting part being that somewhere along the line a top plate or two has been reused as a stud. Even the tenon from the stud which once stood underneath, still remains in the mortise. It's well known in the town that post gold-rush, when times became very tough, a vast amount of the buildings that had sprung up overnight to cater for the thousands flooding towards the goldfields, came down just as fast and were sold off or re-used in other dwellings.
On this top plate you can clearly see how a carpenters axe has been used to pair down the 'soldier' into a tenon to fit another mortise. It's so refreshing see good traditional carpentry techniques. It illustrates how sad todays gang nail and glue approach to framing is in comparison.
The interest wasn't confined to the walls. Here's my very worn boot on one of the original baltic floorboards. The last time I saw floorboards like this was in Hancock Shaker Village. Joe tells me they will be cleaned up and re-used in the build.
Joe's work as a builder focuses on eco-builds and the re-building of Tom's Cottage will be an ideal canvas to showcase these sustainable building techniques. I have no doubt it will be a credit to him and Deb and to our great town too.
Friday, 8 February 2013
Just trotting....
A few more hours spent on the Smarthead shave horse today has seen all of the joinery completed and now only some finishing touches required before it's ready for our Coopered Bucket Course on the 23rd.
Repressing my desperate need for over embellishment, I hid my screw-box then suppressed the memory of where I had hidden it. So with pure utilitarian thoughts coursing through my head, I inserted plain dowels with no threads and raided the scrap bin again for odd bits of timber to use for the clamping head.
A very nice piece of Messmate reared it's head, seemingly calling out to be shaped into the head. Being heavily figured with a very nice fiddle back grain, I rejected it at first, reciting my 'Keep it Simple' mantra in my head. But hang on a minute I thought, Shakers use figured timber too. It's just the way they used it that mattered.
I quickly squared, cut and laminated the head together after cutting the through mortise for the pegged tenon. While the lamination was setting up I marked out, drilled, measured and turned the two stretchers for the front and back legs. By this time the head had set and I shaped it quickly on the router table.The middle of the head needs to be a little more narrow for my liking, but I'll work that out tomorrow.
The Blackwood in stretchers and legs was some that I had collected on my trip to Otways with Pete Galbert, Murray Kidman and Carl Karascay. My crafty sub-conscious will always find a way to make these things have meaning to me.....
One of the more important factors of the way this, or any shave horse works, is the balance of the clamping mechanism. You want the head to lift and the treadle to return somewhat close to vertical when pressure is taken off the foot lever or treadle plate.
When balanced properly the operator merely has to shift the weight of his foot on the treadle to be able to turn the workpiece then re-apply pressure to clamp. It makes for very quick work in shaping spindles or any other chair parts for that matter.
So with this in mind I found the angle I wanted for the treadle plate, then raided the wood pile again. This time I grabbed a lump of Elm, partly because of the weight, partly its size and mainly due to its strength and interlocking grain. I don't want this treadle to give way any time soon.
I cut the through mortise purposefully forward of centre so that at present it is heavily overbalanced underneath. Tomorrow I will merely trim the back of the treadle incrementally until I get the balance just how I want it. Then a quick hand plane over the lot, trim the dowels, arris all the edges and seal it with a splash of something or other to keep the marks off and this horse will be ready for it's first good run. Giddyup!
Repressing my desperate need for over embellishment, I hid my screw-box then suppressed the memory of where I had hidden it. So with pure utilitarian thoughts coursing through my head, I inserted plain dowels with no threads and raided the scrap bin again for odd bits of timber to use for the clamping head.
A very nice piece of Messmate reared it's head, seemingly calling out to be shaped into the head. Being heavily figured with a very nice fiddle back grain, I rejected it at first, reciting my 'Keep it Simple' mantra in my head. But hang on a minute I thought, Shakers use figured timber too. It's just the way they used it that mattered.
I quickly squared, cut and laminated the head together after cutting the through mortise for the pegged tenon. While the lamination was setting up I marked out, drilled, measured and turned the two stretchers for the front and back legs. By this time the head had set and I shaped it quickly on the router table.The middle of the head needs to be a little more narrow for my liking, but I'll work that out tomorrow.
The Blackwood in stretchers and legs was some that I had collected on my trip to Otways with Pete Galbert, Murray Kidman and Carl Karascay. My crafty sub-conscious will always find a way to make these things have meaning to me.....
One of the more important factors of the way this, or any shave horse works, is the balance of the clamping mechanism. You want the head to lift and the treadle to return somewhat close to vertical when pressure is taken off the foot lever or treadle plate.
When balanced properly the operator merely has to shift the weight of his foot on the treadle to be able to turn the workpiece then re-apply pressure to clamp. It makes for very quick work in shaping spindles or any other chair parts for that matter.
So with this in mind I found the angle I wanted for the treadle plate, then raided the wood pile again. This time I grabbed a lump of Elm, partly because of the weight, partly its size and mainly due to its strength and interlocking grain. I don't want this treadle to give way any time soon.
I cut the through mortise purposefully forward of centre so that at present it is heavily overbalanced underneath. Tomorrow I will merely trim the back of the treadle incrementally until I get the balance just how I want it. Then a quick hand plane over the lot, trim the dowels, arris all the edges and seal it with a splash of something or other to keep the marks off and this horse will be ready for it's first good run. Giddyup!
Thursday, 7 February 2013
The simple things........
With only a hour between a morning spent elsewhere and picking up Tom from school, there was not much time for work on the shave horse today. I always seem to be in a quandary when it comes to making jigs or tools that I use around the workshop. Part of me wants to make 'it' , ( whatever that 'it' may be ) as perfectly as possible. Same reason why we all like to buy quality tools to use. The other part of me just says "for *#@% sake, just make the thing and lets get on with it ! "
The second was solid New Guinea Rosewood, has a similar seat and a horses hoof carved on the front leg! Overkill? Yup, especially when they fall over in the back of the ute, get cut by the odd drawknife and generally knocked about.
There are small problems associated with both. Spending too much time making jigs and things which are essentially utilitarian, is not exactly a proactive use of time. On the other hand making things that end up looking like they've had a beating with the ugly stick doesn't project the work you'd like to be known for and are certainly not as pleasant to use or have around the place.
And so it is with the shave horse I'm making at the moment. The last two I made a few years back, I spent perhaps a bit more time than was necessary.
The first was made from a single slab of Tassie Myrtle and was adorned with an original H V McKay Tractor seat and a compliment of hand cut wooden threads on all the pivot pins.
The second was solid New Guinea Rosewood, has a similar seat and a horses hoof carved on the front leg! Overkill? Yup, especially when they fall over in the back of the ute, get cut by the odd drawknife and generally knocked about.
So with that in mind this one will not be anywhere as elaborate. The main frame and parts are Maritime Pine I milled a while ago. The 'Smarthead' mechanism, some odd bits of English Ash I had lying about.
In a brief hour I managed to cut the angled frame and cut the mortise in the frame and clamp bed, where the leg of the mechanism will project through.
And so I have decided to adopt a 'Shaker' ideal with this horse. Make it well, with simple clean lines and no unnecessary embellishment. You know, the KISS principal - Keep It Simple - Stupid. Perhaps I should lock up the carving chisels and thread cutting screw boxes......just to be on the safe side! Hope to get it close to finished tomorrow.
Wednesday, 6 February 2013
Cool Stuff
Despite some days running around in ever decreasing circles, not knowing which way to go or where to start, I have to say I wouldn't change things for love nor money. I enjoy what I do, I enjoy making chairs and pretty much playing around with wood in general, in one way or another. I most often work alone, so I also enjoy seeing ( and hearing ) what others are up to whether locally or on the other side of the world. It might be something as simple as seeing what timbers others are using or unearthing a new technique. As Einstein said, " Once you stop learning, you start dying."
The other day when I checked out Greg Pennington's blog - Around the Shop ( link in the Blog List column on the right ) I was quite surprised to see a few parallels, albeit way over yonder in the States. Greg's work is superb, Windsor chairs and furniture alike. Greg, like Pete Galbert, is also responsible for a few techniques and contraptions which make my work in making Windsors much more enjoyable and accurate to boot. One of those being the use of lazers in teaching the reaming of holes and also Greg's part in the making of a very clever new mechanism for a shave horse. Here's the link to Pete's blog where it all began.....
So when I saw that Greg had been milling some sassafras for chair seats that got my attention. Then I saw a finished Elm seat in what looked like a Sack Back ( a Double Bow if your across the pond from the U.S. ). The trifecta was seeing the last photo of one of Greg's students' new 'Smart Head' shave horse.
I've just finished a perch in Black Heart Sassafras and I'm half way through the Crested Rocker with a nice one piece Elm seat.
Unbelievably, just that day Tim McLeod and I had finished working on the mechanism for.......you guessed it, a couple of Smart Head shave horses!
No it's not the para-normal, voodoo or black magic but it's a pretty cool coincidence. I guess what it also tells me is that good chair making wood, is good chair making wood, no matter where you are. Good wood working tools and fixtures are the same and most people know what's good when they see it. But most importantly for me it emphasises how lucky I am to have people like Greg Pennington, Pete Galbert and a host of others both near and far who are as passionate about what they do as I am and are sharing their wisdom with the rest of us. Now that is pretty cool.
Monday, 4 February 2013
A special Rocker
In amongst a few Perches, Shaker furniture and oval boxes, cutting boards and home-wares I've been slowly making one Pete Galbert's Crested Rocking Chairs.
This is the rocker that I learnt to make from Pete himself in his then newly set up chair making workshop in Sterling, Massachusetts. According to Pete, I was the first person to make a chair in that shop for about 150 years or so. It turned out it had belonged to Newton Burpee, one of Sterling's very original Windsor chair makers of the late 1700 to early 1800's. Incredible stuff.
Anyway, not having access to green ( freshly felled, not the colour.... ) White and Red Oak and magnificent Butternut that I used for my American chair, I am substituting both for timbers I have milled here over the past few years. For the seat I have substituted the Butternut for 100+ year old Elm, which hailed from Daylesford, just 25mins down the road from us. The rest of the chair will be made from select Pin Oak. This particular log was one that I had salvaged from the Domain Gardens, just North of the gates to Government House. I don't have much of it left now, so it's pretty valuable to me.
GIven that the timber is limited and the process is relatively complex, from a Windsor chair making persepective, I have been taking my time to ensure that there will be no errors. A simple error in a perch or continuous arm chair merely means making a new part from readily available timber. Making an error with the Crested Rocker means expensive firewood and re-making steam bent parts from my limited supply.
I'm not intending on a blow by blow account of how the chair was made, but just thought I'd show a few photos of the Rocker as it takes shape. Last post saw the seat bowl roughed out.
Here is the seat fully shaped and ready for final smoothing with card scrapers and light sanding.
The grain pattern in the Elm is outstanding.
The stiles are steam bent as octagons which allows ease of working through other stages of their shaping and fitting to the chair.
Reaming the stiles into the seat is a little complex due to the stiles being curved and not in a straight axis. As well as being accurately raked to the desired angle they also must be parallel in both planes, the crest rail parallel to the seat and splayed correctly to ensure the crest tenons fit accurately into the mortises cut into the stiles. So just a few things to watch for.....
Here are the stiles and crest from the top the chair with the stiles reamed. I use a pair of winding sticks to check alignment.
I have to step away from the rocker for a few days now as other projects are calling but stay tuned for the next instalment where I will have the arms posts reamed, arm paddles reamed and shaped and a few of the spindles roughed out.
Friday, 1 February 2013
Course Updates.....
Lisa and I couldn't be happier with the response we have had to our first round of classes at our Central Highlands Workshop. With chair, perch, box and bucket classes booking up we have a few spots left, but we really would recommend that if you are interested in a class to contact us sooner rather than later, as we are receiving enquiries daily.
Also, if it's a chair you want to make and our dates don't suit then please let us know what dates might work for you. This is for chair courses only though and not Perches.
Short and sweet tonight as sleep beckons and a rocking chair demands my full attention in the morning! That and a 5 year old boy who has yet to discover the joy of sleeping in! Cheers....
Also, if it's a chair you want to make and our dates don't suit then please let us know what dates might work for you. This is for chair courses only though and not Perches.
Short and sweet tonight as sleep beckons and a rocking chair demands my full attention in the morning! That and a 5 year old boy who has yet to discover the joy of sleeping in! Cheers....
Wednesday, 30 January 2013
A few more Perches...
Saturday saw David and Michael arrive at our workshop for our first 'official Rundell & Rundell' chair course. I know I've said it before, but these little Windsor style stools are great fun to make and just the right introduction to chair making. The combination of simple cigar style leg and stretcher turnings and a small hand carved seat ensures that the process is not all intimidating, no matter what your level of expertise.
Both David and Michael had wood working experience and took to the turning like ducks to water. Same deal with the carving too.
At the end of the three days they each took home a very fine Perch of American Oak and Eastern White Pine, quite fitting I thought, U.S. 'lumber' for a U.S. designed stool. The timing of the course worked well as I had a commission to make a special order Perch for a local artist. I used the commission piece as my demonstration model.
This was no ordinary Perch however, with the commission calling for a figured Black heart Sassafras seat and Black Walnut legs. I've made a good deal of furniture with that combination, the Black Walnut highlighting the dark figure in the Sassafras.
The stock for the seat was some of the first timber I milled. I had bought the log in from Tasmania and it had been strapped and stacked in the shed for years.
I think it came up a treat. Another coat or two of Danish Oil and it'll be ready to head to it's new home on Friday.
There's a lot going on in the workshop at the moment, with classes booking up and orders for chairs. High on the list is a Galbert Crested Rocker which has to be finished in a few weeks. It's for a very special customer indeed. A new customer you might say. A few updates to come....
Wednesday, 16 January 2013
The Workshop
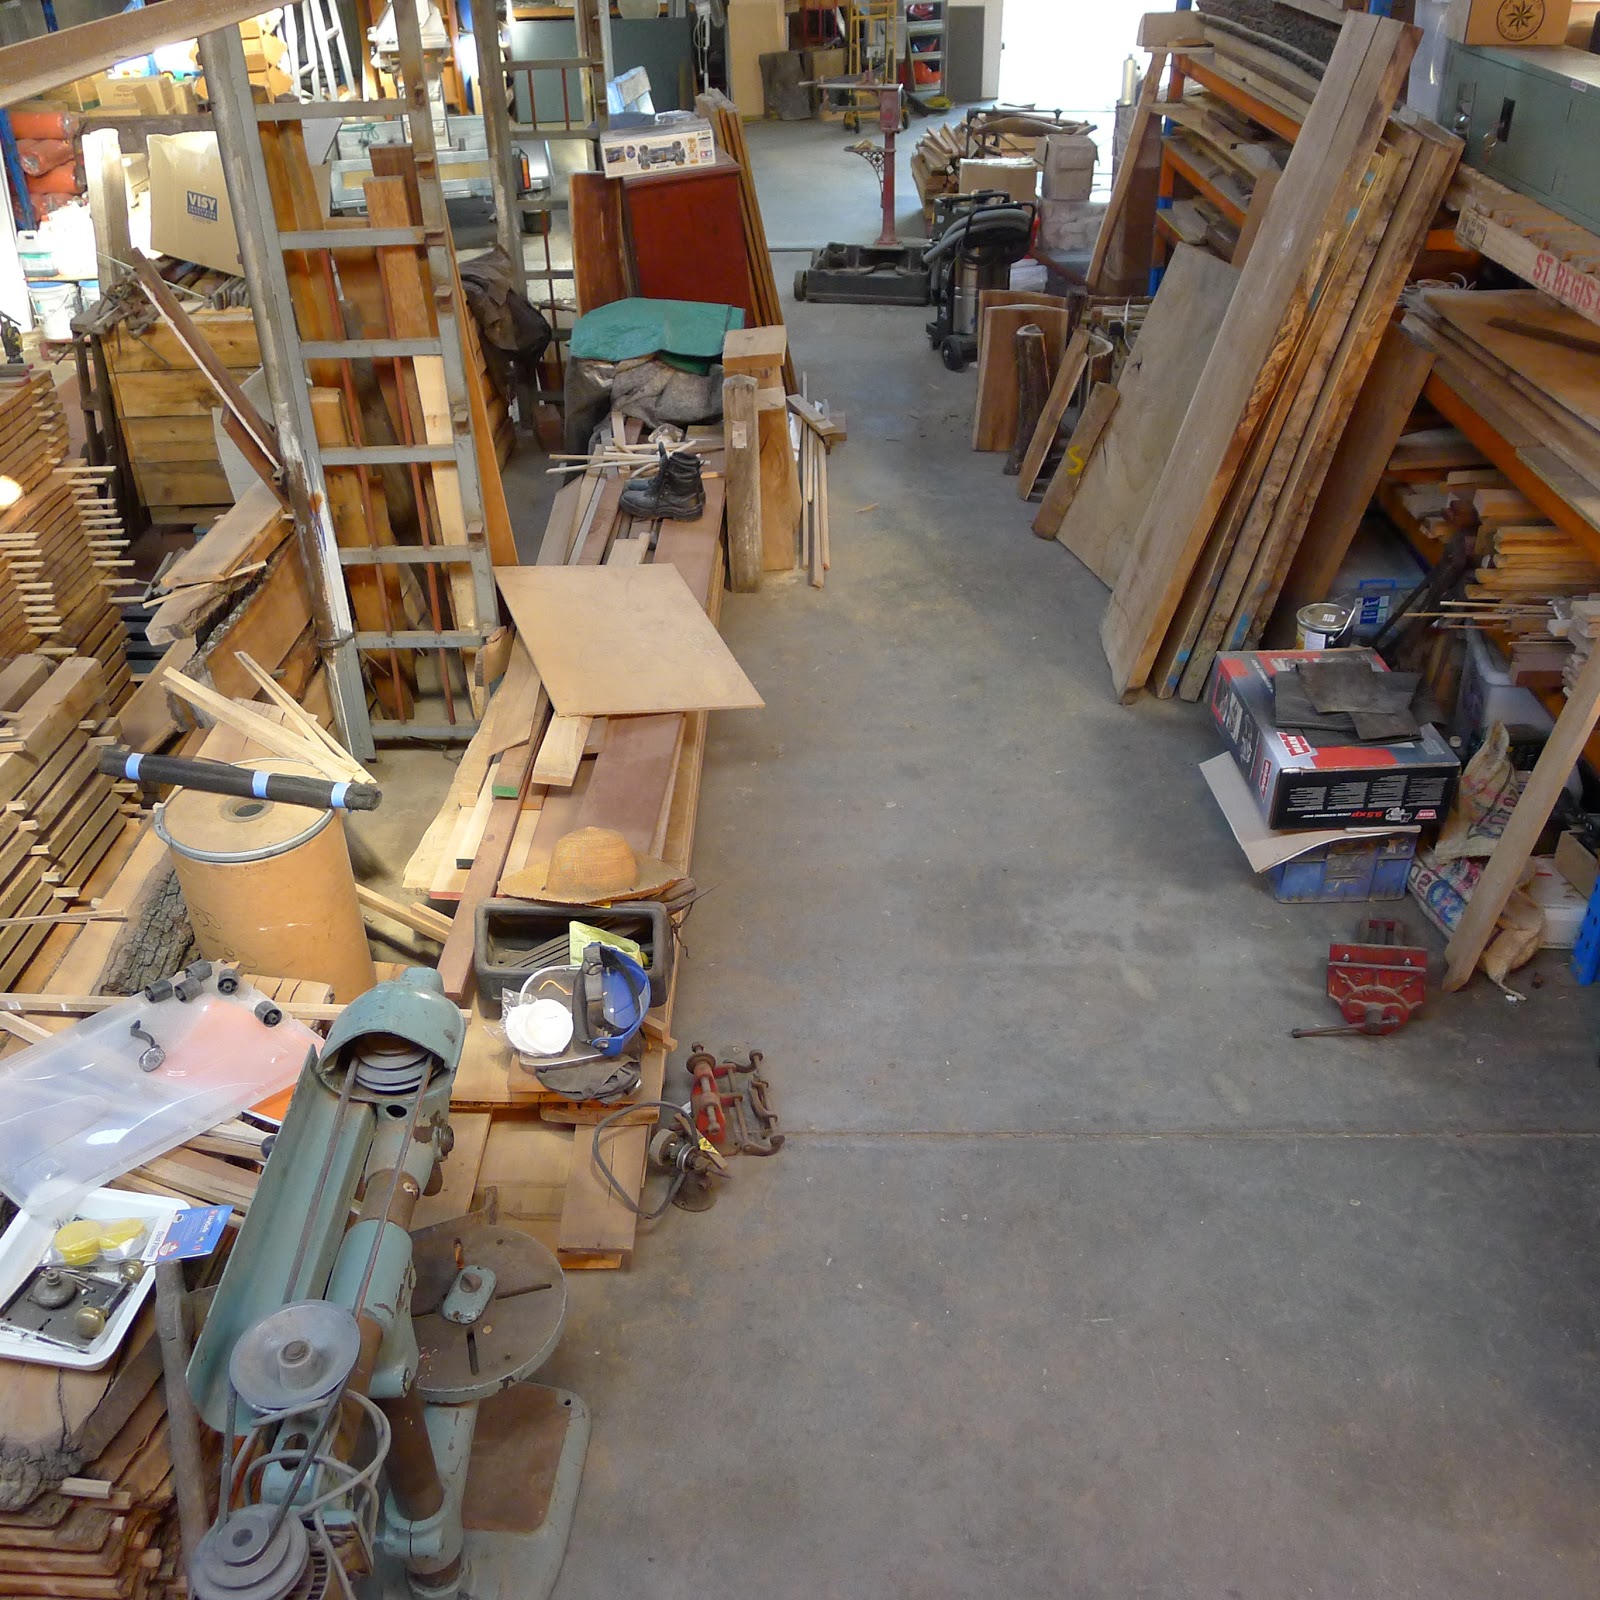
A plumbers shed a couple of times, an auto electricians workplace, a hospitality and packaging warehouse. Our new workshop has worn a few hats over the years. It even lay dormant for a long time. When I say new, I should say, it's only new to us. You see she's a pretty old and run down old shed, but it's a good space. Space being the operative word, there's a lot of it. Not just inside either, which is what appealed to me when I first enquired about the property.
As our first 'official' Rundell & Rundell course draws closer I thought it might be of interest to show you all around the shop. There's a long way to go, but the bones are there.
Here's the machine room. I may espouse the virtues of traditional wood working and hand tools, but machines obviously play a part in our business and some of the wood work I produce. To that end I feel the same way about the quality of the machinery I buy as I do about my hand tools. For a number of years I have collected my machines methodically, often waiting for years until the right old machine turned up. That's true of most of my drill presses, the mortise machine and my older lathe.
Some of these have been in pristine original condition and some I've restored. When I couldn't find the right old machine or didn't feel confident that the 'right' machine had been treated well, I bought new. ( trust me, old machines -just like old cars- cost a lot of money to fix if they break down! ) That's the case with my Austrian made Felder bandsaw and combination machine and my new Australian made Vicmarc variable speed lathe.
Yes, I'm very proud of my machines, in fact some people might say I have an unnatural love for my Waldown drill ! ( Far right in pic, nice eh? ) But it's not about their cost. In fact I see it as the polar opposite. You see while the new machines might cost considerably more than a Chinese or Taiwanese option, in my eyes they are usually much cheaper. Not only will a quality machine provide years of faithful service, if they do break down, they can be repaired. Cheaper Asian imports with their poor castings, bearings, motors and plastics are most often reduced to boat anchors when they fail. So after you've bought yet another machine to replace the first one, the price of the quality machine is actually quite reasonable. Not to mention resale value. But, back to the workshop!
The machine room is also home to a considerable amount of our stores of dried and green milled timber. Everything from Elm to Ebony, Blackwood to Blackbean, we have a goodly selection of some pretty nice stuff. Our old Vicrail Workshops workbench is out here too, for any hand held power tool use.
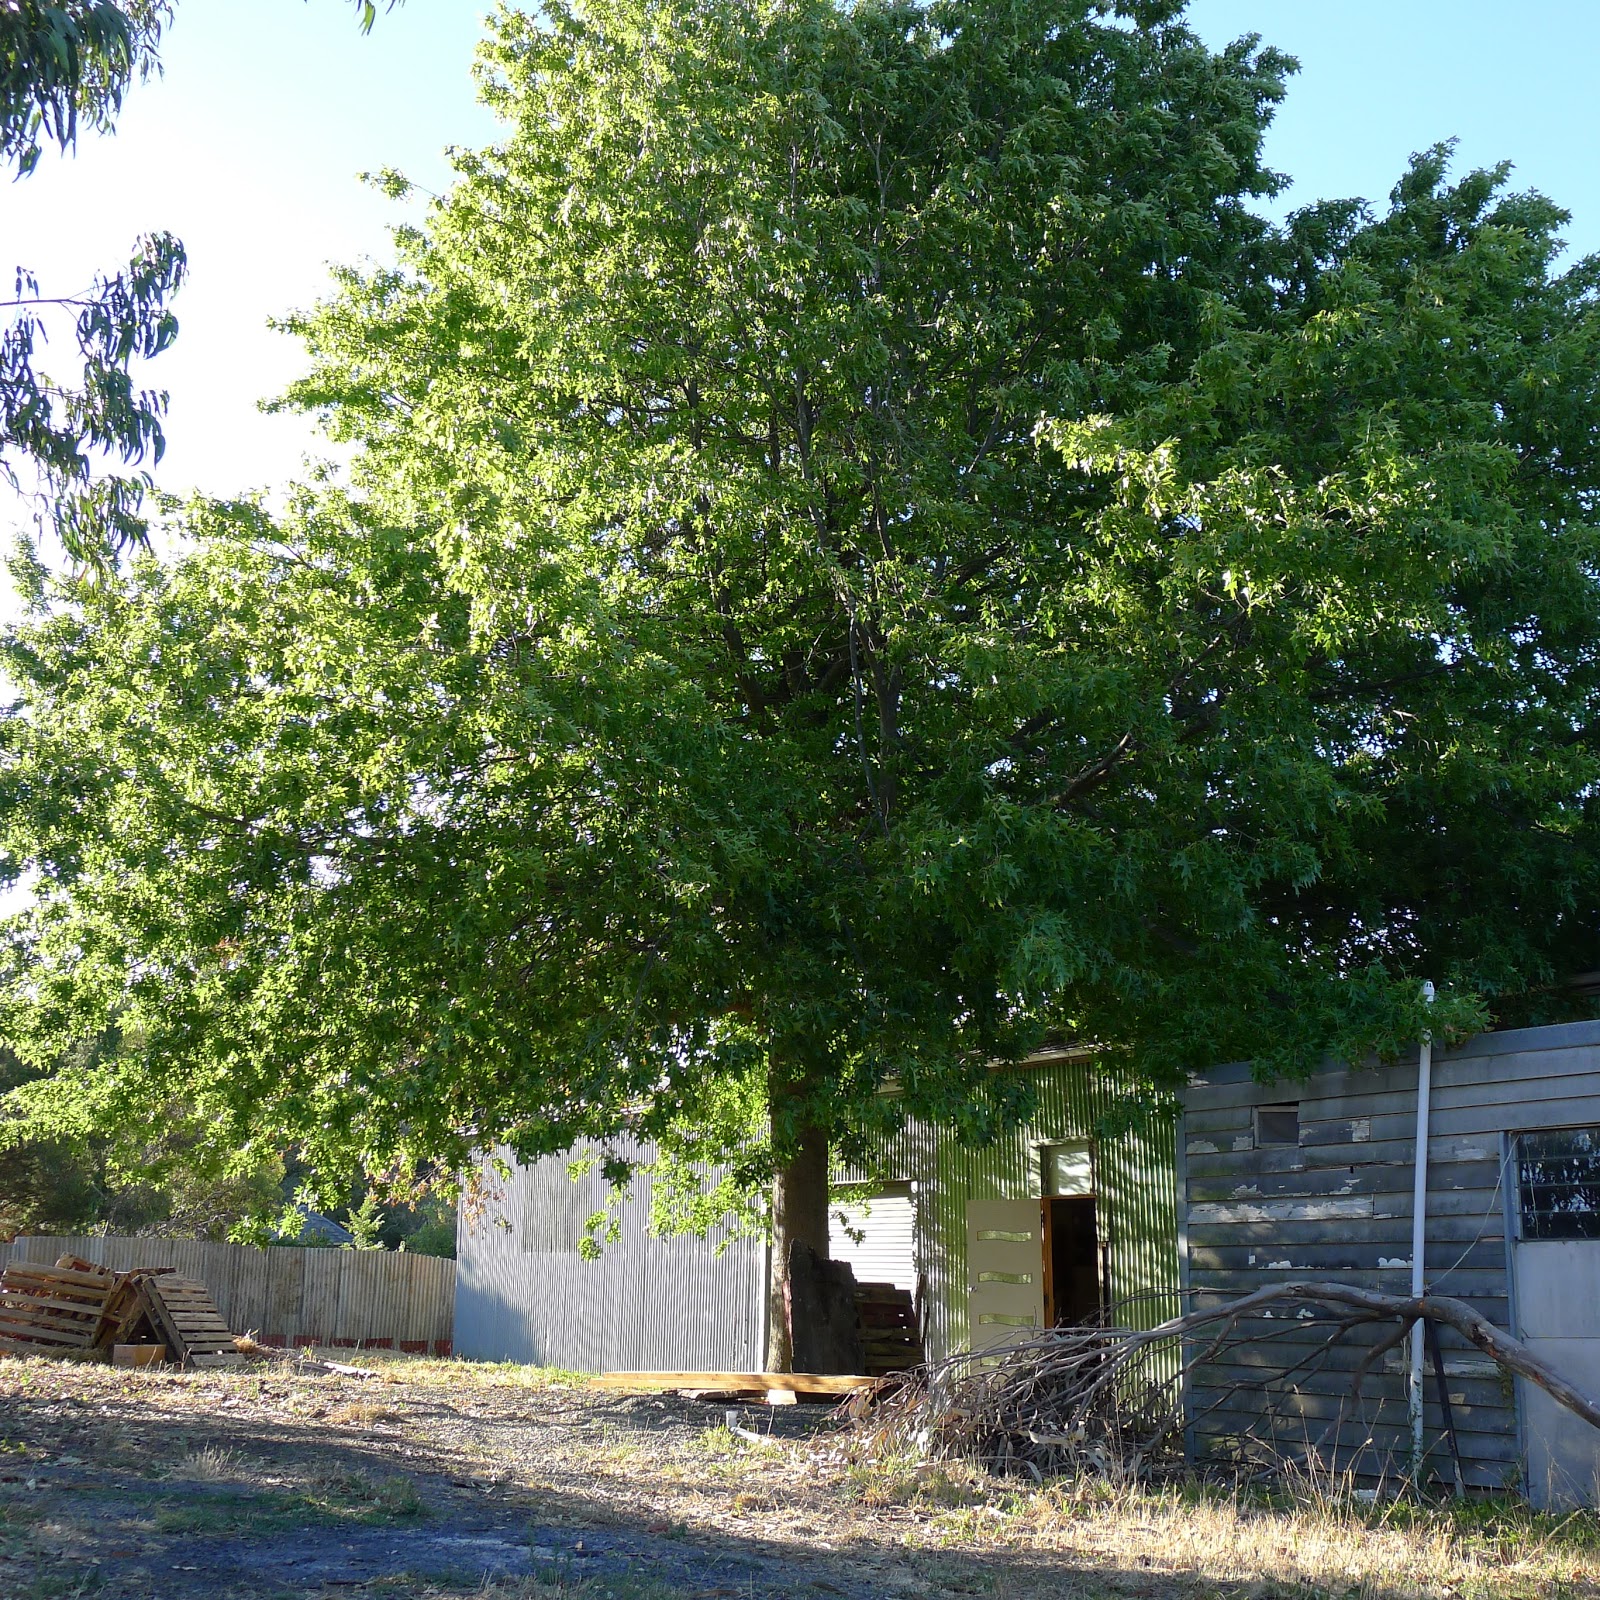
There's also the yard. Another storage area for the timber we are milling. Here's some of the Blackwood from our trip to the Otways. But the yard is not just for storage. It's also home to one of the best specimens of Pin Oak I've seen in a while.
This lovely old Oak will provide shade for budding chair makers while they sit on their shave horses making spindles. Nothing like a bit of good 'ol fresh country air!
Our bench room is the heart of the workshop. Housing our two old European made workbenches and a third utility bench, this room is all about quiet woodworking. About not having to scramble for hearing and eye protection when a dust extractor or hand held router is fired up. Air conditioned for the summer and a wood heater for the winter, it promises to be a pleasant work space.
A separate kitchen area and enough onsite parking for over a dozen cars, the old girl has some merit. Better still in the morning we are talking with the first of our potential co-tenants, an exciting prospect and part of a much grander plan than just Windsor chairs and wood work . So stay tuned and watch this space. Or better still come and take your place here and see it for yourself!
Monday, 7 January 2013
You bought beans?
The last week has been a dusty and hot affair. I've been down to the Otways milling some spectacular Blackwood with Dad and Carl Karascay. More to follow about Carl and his family later...
This was no ordinary Blackwood though with each log being around 8 metres long and most of them barrel straight and BIG. Between the 3 of us we milled over 15 cubic metres of the stuff in the last few days, a good effort with a portable mill I'd say. Good friend and fellow furniture maker Tim McLeod even came down and got in on the action, milling up a very nice 1.2 cube log too.
There was some good variation throughout the logs from light browns through to rich and deep reds. A couple of logs even showed some nice fiddleback figure. The Blackwood will be set aside for both furniture pieces and chairs. The timber earmarked for furniture has already been sticker-ed and is going to be kiln dried, the chair stock will be sticker-ed, stacked and put aside to air dry naturally. Why? Air dried stock can still be steam bent reasonably successfully, kiln dried cannot, unless it's a very slight bend. So the air dried is much more versatile stock for me, chair wise.
Some of the wany edges split for spindle and legs stock......waste not
The unfortunate part of the whole deal was starting last week with two 40 degree days in a row, unpleasant. But the nights were anything but, staying out a Carl's place.
His view of the Otways is pretty damn fine.
But beans you say??
Whilst I was down that way I happened to come across a few stacks of pre-cut stickers. Stickers, spacers, sticks, I've even heard them called sliders. Whatever you want to call them, these wooden spacers for puting between green timber are invaluable to sawmillers and without them your just wasting your time and the wood your cutting.
So when I heard from Carl that he had a source for them I was pretty happy. Happier still when I found out they were 'Class A' hardwood. Knowing that I have a lot of Elm, Oak, Plane and other logs to mill I thought I'd best buy a couple of packs. Ok, I bought four packs, but you can never have too many right? Well perhaps I should have looked at the packs first. They are immense, so much so that when Carl loaded them onto the ute the springs lay flat! I have another trip to Colac later in the week just to collect the rest! Over 3 tons worth all up I think.....oops.
I came home that day with the first load of stickers and a couple of packs of Blackwood. As I unloaded I had visions of Lisa seeing the huge pile of sticks and saying you came home with sticks? "You went milling Blackwood and came home with sticks??" "STICKS!?" You know the whole Jack and the beanstalk thing. Of course then then I started thinking of beans, which in turn made me think of the Blazing Saddles bean scene. Hilarious. Anyway enough about the beans. I'll eventually have a page on our website ( which is all but a week or so away from coming on-line ) about the timber I'm milling, but in the interim I thought I'd throw open an opportunity here on the blog.
Blackwood retails for around the $4700 per cube mark for 2"/50mm stock at one of the better known Melbourne timber merchants. I thought I'd make some of this magic freshly cut stock available, but at a very reasonable price. It all averages around 50 and 60mm thick, 400 wide and around 4m long.
So if you are interested in either green or kiln dried Otways Blackwood, drop me an email here and let me know. Cheers.
Tuesday, 1 January 2013
Hear Ye! Hear Ye !! 2013 Course Dates
Happy new year to you all. Although we downed tools and needle and thread for a moment or two between Xmas and New Years, we've been furiously collating dates for our first year of workshop classes. It's such an exciting prospect for us to be officially offering the first classes in our new Central Highlands Workshop that it's a little like Christmas all over again.
Due to commitments milling timber and previously booked courses we have only one course scheduled for the remainder of January.
18th - Bar Open!
Rundell and Rundell's Wine Bar, The Chairmakers Wife, re-opens providing a select range of wines, beer and cider in relaxed atmosphere on Kyneton's historic Piper Street.
When we decided to offer classes in woodworking we wanted to be sure that we were offering classes that were not 'run of the mill' or say, a little dreary! Classes that inspired creativity in people and of course that related to lost trades and techniques that are rapidly disappearing from our landscape.
And so with that in mind we put in a considerable amount of footwork and have come up with what we think are a good cross section of classes for the first half of 2013. We will try and run 2 and occasionally 3 courses per month. These will vary and should ensure that there is something of interest for most people. We would have liked to offer more but we have to set aside time to make stock for the shop too and of course allow time for commission work, which is already mounting as we speak. Please contact us here to express your interest in a course and please remember that we have had an exceptional response to our workshops so we recommend that you book early.
Also, keep an eye on the blog for the opening of Watervliet Shaker Cottage, our self contained Shaker style cottage in the heart of Kyneton. We will be able to offer subsidised rates during the week for people participating in 'chair making courses.' So without further ado, here's the course information and dates
January
Due to commitments milling timber and previously booked courses we have only one course scheduled for the remainder of January.
18th - Bar Open!
Rundell and Rundell's Wine Bar, The Chairmakers Wife, re-opens providing a select range of wines, beer and cider in relaxed atmosphere on Kyneton's historic Piper Street.
Perch Class - 26- 28th inclusive. - FULLY BOOKED
The Perch is an ideal introduction to windsor chair making. A design collaboration between Pete Galbert, Curtis Buchanan and Galen Cranz, the Perch is unique in that it is designed with a short front leg, tilting the carved seat forward. This rotates the sitters pelvis forward keeping their back straight and encouraging good posture. Participants will get an introduction to wood turning, shaping the legs and stretchers. Hand carving the seat and drilling and reaming the leg holes and fitting the stretchers round out an enjoyable 3 day course with most participants getting the opportunity to apply the first coat of their chosen finish. A maximum of 3 students at one time ensures a quality learning environment with personalised attention. Come and experience a great introduction to chair making and take home a Perch made by your own hands and something not otherwise available for sale outside of our retail shop, Rundell & Rundell Chairmakers.
$500 including all materials and light morning and afternoon teas.
February
Seymour Alternative Field Days - 15-17th inclusive -
Come along to one of Australia's most progressive country field days with an expected crowd of over 45,000 per day, Seymour is where you can see the latest innovations in farming, agriculture and everything in between. We will be part of the Lost Trades exhibit, along with traditional Stone Masons, Lead Light Window makers, Broom makers, Hedge layers/rowers, etc. It will be a great weekend and worth a visit. For more information visit their website here .
Coopered Bucket Course - 23rd - with George Smithwick of Beveridge Coopers.
- FULLY BOOKED
George comes from a very long line of coopers and is an incredible tradesman, able to make just about anything from wood and iron, from barrels to buckets, wagon wheels and carriages to oval boxes and everything in between.
- FULLY BOOKED
George comes from a very long line of coopers and is an incredible tradesman, able to make just about anything from wood and iron, from barrels to buckets, wagon wheels and carriages to oval boxes and everything in between.
Come and spend a day in the workshop with George and learn how to make a traditional style coopered wooden bucket, with wooden staves and iron hoops. Then finish it off with the proper spliced rope handle. George will go though the techniques employed by coopers for centuries to mate wooden staves together to form a watertight seal and the techniques for measuring and shaping and fitting the solid wooden base. Learn how to shape flat iron into a round bucket hoop and rivet it together with traditional 'tinmans rivets.' Then assemble the bucket and fit the spliced rope handle, taking a home a watertight bucket that will last for generations! An amazing day class with an inspiring teacher. Limited to six places only, please express your interest quickly as we are already aware how popular this course will be.
$220 per person includes all materials and light morning and afternoon tea refreshments.
March
Perch Class - 9-11th inclusive - please see above
Shaker Oval Box Class - 23, 24th - FULLY BOOKED
The Shaker Oval box was a mainstay of Shaker community life, utilised everywhere from the Bretheren's workshops to the kitchen, housing everything from copper tacks to foodstuffs. I learnt how to make these beautiful traditional boxes from the modern father of Shaker Box making in America, John Wilson of Charlotte, Michigan and we now bring that tradition to Australia. Over the course of the weekend, Saturday morning and Sunday afternoon, learn how to shape, and prepare the box bands before heating them in hot water and bending them around a formwork to create your box. The bands are then tacked in place with U.S. imported traditional copper tacks before being set aside to dry overnight. On Sunday afternoon when your boxes are dry, mark out, cut and trim your bases and lids before pegging them in place with wooden dowels and not a drop of glue! An unchanged process for generations, the oval box making class is suitable for most ages and pretty much any woodworking skill level. Set over the weekend, so you can take in the township of Kyneton and experience a lunch or dinner at one of our many chef hat awarded restaurants! Participants can expect to make and take home 3 finished shaker boxes and the know how to continue to make them at home.
$220 per person, with all materials and light morning and afternoon tea on each day provided.
April
Continuous Arm Chair Course - 7 -13th inclusive - FULLY BOOKED
The Continuous Arm Windsor Chair is perhaps the only chair the the U.S. can claim was designed on their soil. Getting it's name from the single piece steam bent crest rail which gracefully sweeps down to become the arm rest on both sides, the Cont. Arm Chair is an iconic New York pattern chair, perfected over years of fine tuning by Curtis Buchanan of Jonesborough, Tennessee. This chair is one of the most graceful windsor chair designs with 13 slender, hand shaped spindles, shield shaped seat and a choice of baluster or double bobbin/Bamboo turnings.
Utilising Curtis's chair patterns, over 7 days participants will master the use of the drawknife and spokeshave, shaping spindles and the crest rail. Scorps / inshaves, travishers and scrapers shaping the seat and learn the techniques for drilling and reaming the 19 compound angled holes in the seat and fitting the 'H' pattern stretchers. Taking home a chair which is a true heirloom and will last for generations not just a few seasons, the Continuous Arm Chair is a course for those who want to experience traditional woodworking as they never have before and take home a stunning piece of furniture that is otherwise not widely available.
$1200 per person or participants booking together will will receive a 10% discount.
Please note - unlike other Australian windsor chair classes, we will only take a maximum of two people at once to teach the art of chair making. We truly believe this gives the best opportunity for participants to experience this traditional craft in a relaxed manner, with undivided attention from Glen and not be lost in a sea of other people. It reflects the manner in which Glen learnt the craft in Tennessee and Massachusetts. We are also happy to co-ordinate mutually convenient dates for individual chair courses only.
Perch Class - 26-28th inclusive -please see above.
May
We have purposefully left the month of May free to work on commissions or to allow for people wanting to book in for further chair courses.
June
Perch Class - 8-10th inclusive - please see above
Sussex Trug Class - 29th
Join us at our Central Highland Workshop where Cooper George Smithwick will show you the secret to making this traditional Sussex style staved basket. The name Trug comes from the Saxon word 'Trog,' a wooden vessel or boat. Trugs shot to fame when Queen Victoria ordered a number of them for her family after viewing them at the Great Exhibition of 1851. Made from cricket bat Willow, as were the originals some 200 years ago, the Trug is the ideal garden companion for carrying freshly cut herbs and flowers, freshly picked vegetables or even kindling for the fire. Come and learn the secrets to making these iconic english field baskets. Participants will learn to steam bend the handle and hoop frame, heat, bend and tack the willow staves into position and trim the basket to it's final shape, taking home a traditional hand made basket otherwise unavailable in the country.
$220 per person including all materials and light morning and afternoon teas.
July
Shaker oval box making class - 6, 7th - please see above
Continuous Arm Windsor Chair Course - 21 - 27th inclusive - please see above.
The second half of 2013 will see an equally exciting range of new chair courses and other interesting and unique woodworking classes with celebrated guest instructors both local and from abroad. We look forward to hearing from you and sharing some great experiences in 2013. So stay tuned and again, Happy New Year!
Subscribe to:
Posts (Atom)